CSS フレームワークの Bootstrap5 を適用します。また、効率的な画面作成のために共通部分を抜き出し画面を分割します。
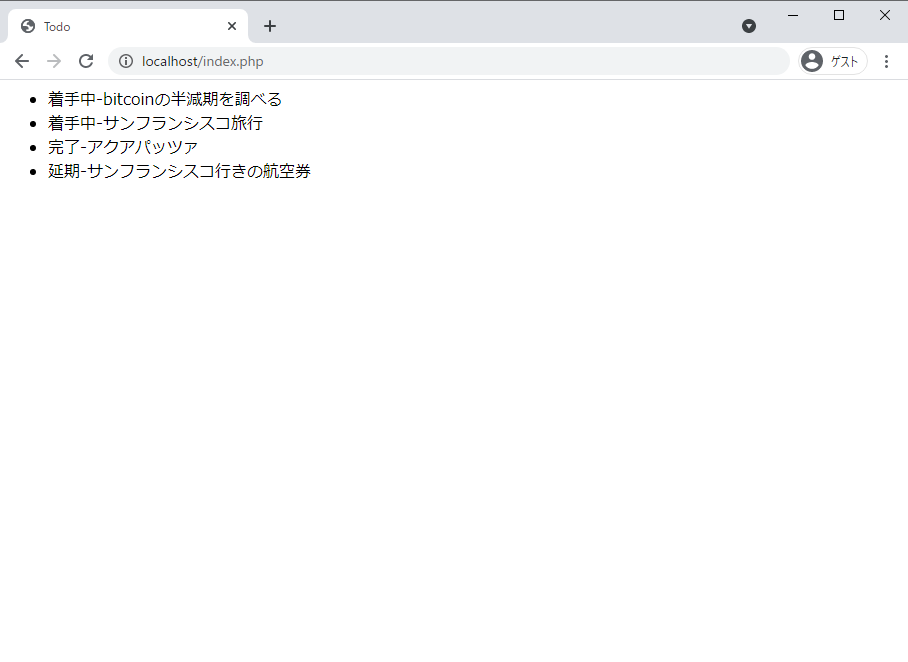
現状のindex.html
現状のページは下記のような簡易なものです。
<!-- index.balde.php -->
<html>
    <head>
        <title>Todo</title>
    </head>
    <body>
      <ul class="list-group">
          @foreach ($tasks as $task)
          <li>
             {{ $task->status_name }}-{{ $task->title }}
          </li>
          @endforeach
      </ul>
    </body>
</html>

CSSフレームワークBootstrap5を適用
CSS フレームワークで最も使われている Bootstrap の次世代バーション 5 を利用します。
Bootstrap5 と旧バージョンの大きな違いは、jQuery の有無です。Bootstrap5 では、jQuery が外されました。 Vue.js、React などのフロントエンドのフレームワークを使うことが当たり前になったきた昨今では jQuery は不要です。
resources/views/index.balde.php を下記の通りに書き換えます。
<!-- index.balde.php -->
<!doctype html>
<html lang="ja">
    <head>

        <meta charset="utf-8">
        <meta name="viewport" content="width=device-width, initial-scale=1">

        <title>Todo</title>

        <!-- Fonts -->
        <link href="https://fonts.googleapis.com/css?family=Nunito:200,600" rel="stylesheet">

        <!-- Styles -->
        <!-- CSS only -->
        <link href="https://cdn.jsdelivr.net/npm/[email protected]/dist/css/bootstrap.min.css" rel="stylesheet" integrity="sha384-giJF6kkoqNQ00vy+HMDP7azOuL0xtbfIcaT9wjKHr8RbDVddVHyTfAAsrekwKmP1" crossorigin="anonymous">
        <style>
            html,
            body {
                background-color: #fff;
                color: #636b6f;
                font-family: 'Nunito', sans-serif;
                font-weight: 200;
                height: 100vh;
                margin: 0;
            }
        </style>
    </head>
    <nav class="navbar navbar-expand-lg navbar-light bg-light mb-4">
        <div class="container-fluid">
            <a class="navbar-brand" href="#">TODO</a>
        </div>
    </nav>
    <div class="container">
        <div class="row">
            <main class="col-md-12 col-lg-12">
                <div class="card">
                    <div class="card-header d-flex justify-content-between">
                        <div>
                            <ul class="nav nav-tabs card-header-tabs">
                                <li class="nav-item">
                                    未着手
                                </li>
                            </ul>
                        </div>
                    </div>
                    <div class="card-body">
                        <ul class="list-group">
                            @foreach ($tasks as $task)
                            <li class="list-group-item d-flex justify-content-between align-items-center">
                                {{ $task->status_name }}-{{ $task->title }}
                            </li>
                            @endforeach
                        </ul>
                    </div>
                </div>
            </main>
        </div>
    </div>
</html>
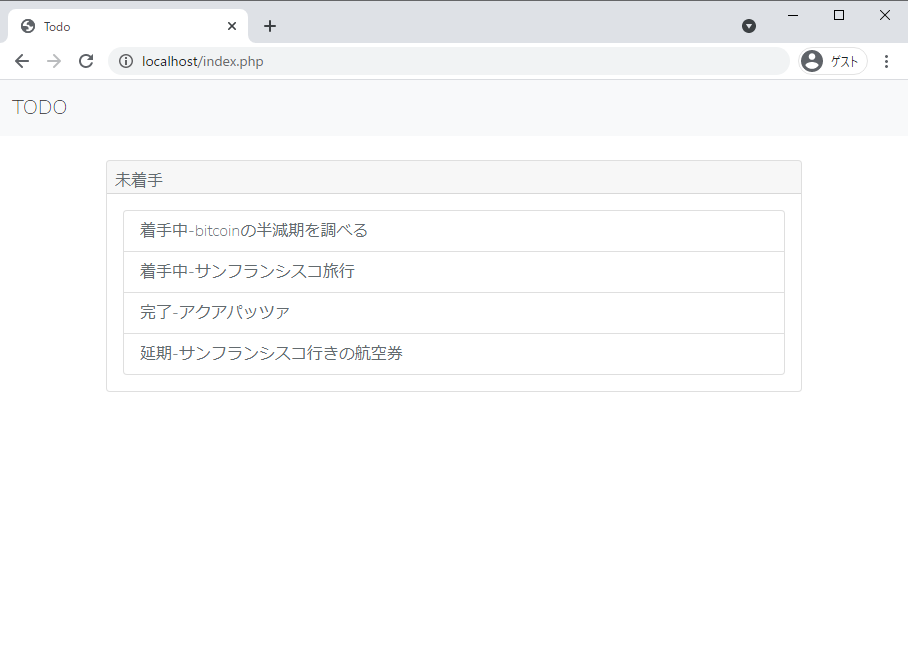
Bootstrap5 を適用することで、簡素な画面から装飾がされたもになりました。また、ページ上部のタイトル、リスト表示のタイトルを追加しました。

ページ分割
ページ上部のタイトルなど、すべてのページで表示するものを各ページで記述するのは冗長かつ面倒です。 そのため各ページ共通のものをベースレイアウトにて記載し、各ページはそれを継承することで共通のレイアウトとなります。
ベースレイアウト
resources/views/layout/にlayout.blade.phpを作ります。
$ mkdir resources/views/layout
$ touch resources/views/layout/layout.blade.php
<!-- layout.blade.php -->
<!doctype html>
<html lang="ja">

<head>
    <meta charset="utf-8">
    <meta name="viewport" content="width=device-width, initial-scale=1">

    <title>Laravel</title>

    <!-- Fonts -->
    <link href="https://fonts.googleapis.com/css?family=Nunito:200,600" rel="stylesheet">

    <!-- Styles -->
    <!-- CSS only -->
    <link href="https://cdn.jsdelivr.net/npm/[email protected]/dist/css/bootstrap.min.css" rel="stylesheet" integrity="sha384-giJF6kkoqNQ00vy+HMDP7azOuL0xtbfIcaT9wjKHr8RbDVddVHyTfAAsrekwKmP1" crossorigin="anonymous">
    <style>
        html,
        body {
            background-color: #fff;
            color: #636b6f;
            font-family: 'Nunito', sans-serif;
            font-weight: 200;
            height: 100vh;
            margin: 0;
        }
    </style>
</head>

<body>

  <nav class="navbar navbar-expand-lg navbar-light bg-light mb-4">
      <div class="container-fluid">
          <a class="navbar-brand" href="#">TODO</a>

      </div>
      </div>
  </nav>

  <div class="container">
      <div class="row">
          <main class="col-md-12 col-lg-12">
              <div class="card">
                  <div class="card-header d-flex justify-content-between">
                      @yield('tab-header')
                  </div>
                  <div class="card-body">
                      @yield('content')
                  </div>
              </div>
          </main>
      </div>
  </div>

</body>

</html>
ベースレイアウトの 2 箇所に@yield を使用しています。
@yield('tab-header')@yield('content')
ぞれぞれ、別ファイルにて定義します。
tab-header
@yield('tab-header')で呼び出すsectionを作成します。
resources/views/layout/にtab-header.blade.phpを作ります。
$ touch resources/views/layout/tab-header.blade.php
<!-- tab-header.blade.php -->
@section('tab-header')
        <div>
            <ul class="nav nav-tabs card-header-tabs">
              <li class="nav-item">
                  未着手
              </li>
            </ul>
        </div>
@endsection
@yield('tab-header')の部分が、@section('tab-header')から始まり@endsectionで囲まれたものに置き換わります。
今はタブヘッダのタイトルが未着手のみですが実装が進めば、着手中、完了を表示することになります。
index.blade.htmlの修正
ベースレイアウトを利用して、resources/views/layout/index.blade.phpを以下のように修正します。
<!-- index.blade.php -->
@extends('layout.layout')

@include('layout.tab-header')

@section('content')

  <ul class="list-group">
      @foreach ($tasks as $task)
      <li class="list-group-item d-flex justify-content-between align-items-center">
           {{ $task->status_name }}-{{ $task->title }}
      </li>
      @endforeach
  </ul>

@endsection
@extends('layout.layout')が継承で、@includeが@yieldで呼び出しているsectionが記載されたファイル名になります。
ベースレイアウトの@yield('content')は、このindex.blade.phpにて、@section('content') と@endsectionで囲んだ部分に記述します。
新しいページを作成するときは、index.blade.phpをコピーして、@section('content')と@endsectionの囲んだ部分を変更することになります。
ブラウザで確認
下記にアクセスして、問題なくタスクのリスト表示ができているかを確認してください。
